The installation process is quite simple. All you need is a computer running Microsoft Windows, which has .NET Framework 4.5 installed. Once the installation is complete, just open your web browser to start using the app. Below is a more detailed description of all steps from Igiko installation to initial configuration.
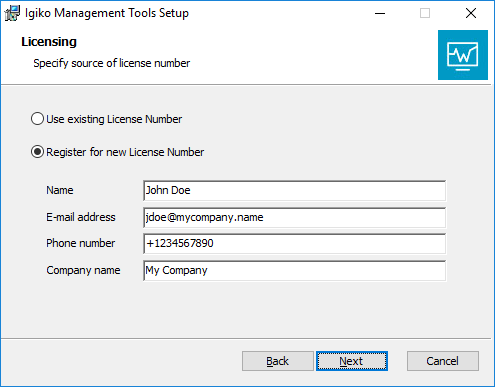
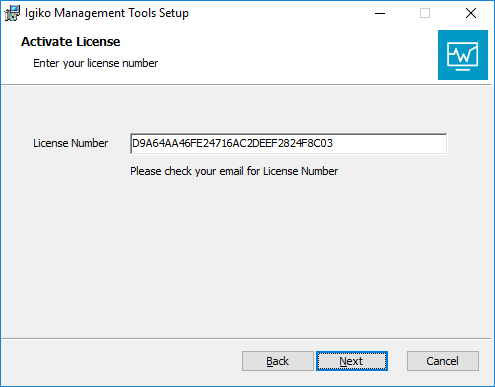
In the first screen of the setup wizard, you are asked to read and agree to the terms of the End User License Agreement. Then you should enter your contact information to get a license number. It will be sent to your email address or you can choose the Use Existing License Number option if you already have the license. Paste its code in the next screen of the wizard.

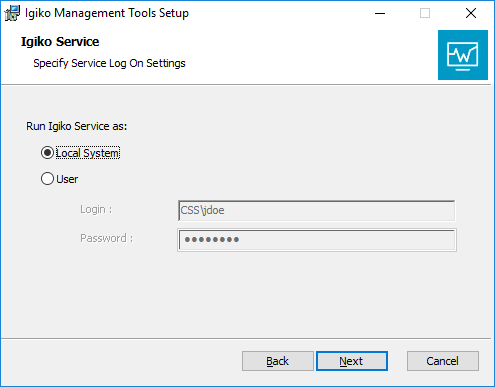
If the code is valid, you can proceed to choose the folder to install the app to, set the service run parameters (by default, Run As Local System). However, you can also identify a specific user that the service will run under. This must be a domain user and at least a local admin.

In the next step, you specify the settings of ports. One port is required for the operation of the app itself and this is a port for web traffic. The other port is required for the Remote Desktop Gateway: it will be used to establish Guest Console connections to hosts and VMs. If you want the app to run from outside the LAN, i.e., through the internet, you need to configure traffic redirect to these ports in your router. In the paid version, you can also choose the type of the DB to be used for the app. In the free version, you can only install the app with the “Local database” option based on SQLite. In the last step you choose the components to install. If you have no Hyper-V hosts, you may skip installing Hyper-V Management Tools.
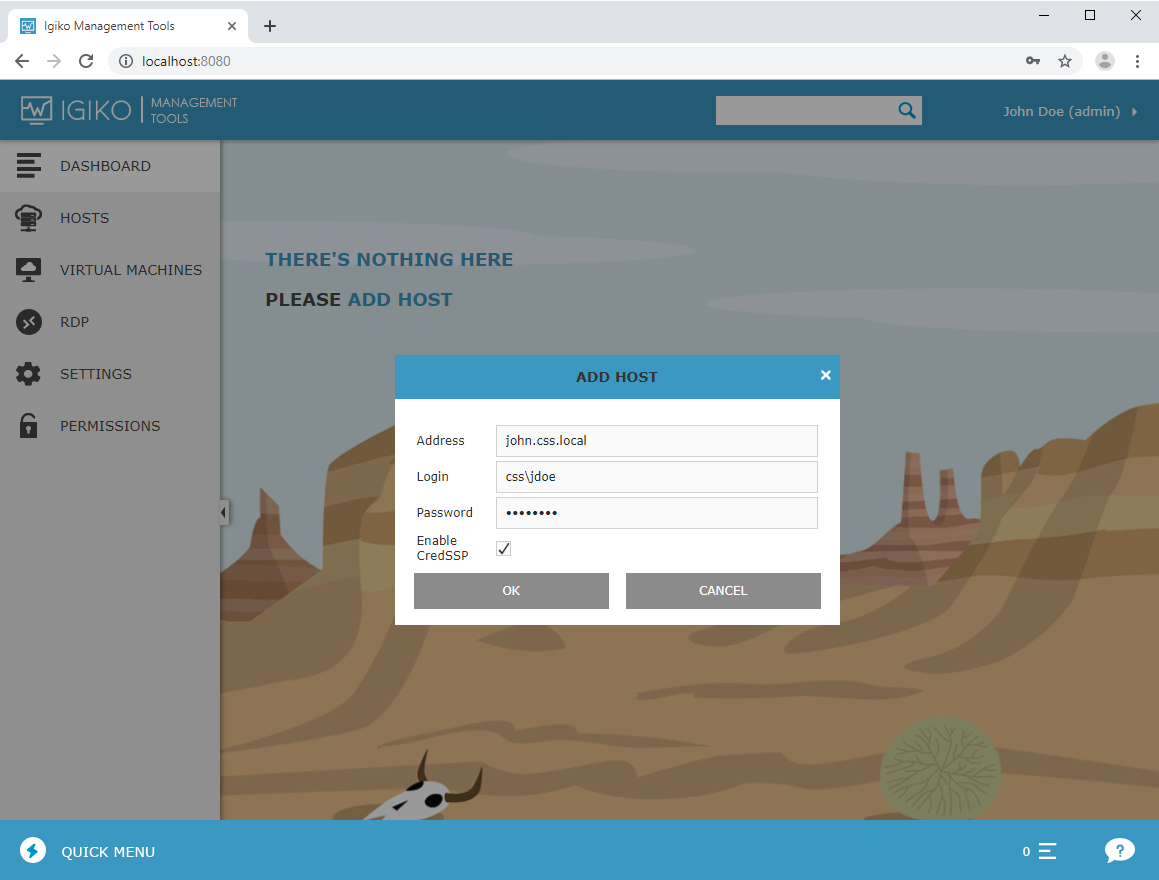
Once you have installed the app, open the browser window and enter http://computer_name:port in the address bar. This loads a page with the main dashboard. Since no object has been added yet, you’ll see a picture with a desert and will be prompted to add a host. Click on the action menu at the bottom or on the link in the Add Host text. This opens a window as shown below. Enter the host’s FQDN, address and credentials of the user with the admin rights on this host. To ensure full-featured operation, enable CredSSP to establish a trusted connection between the host and the computer with the Igiko service. By default, this checkbox is selected in the Add Host dialog.
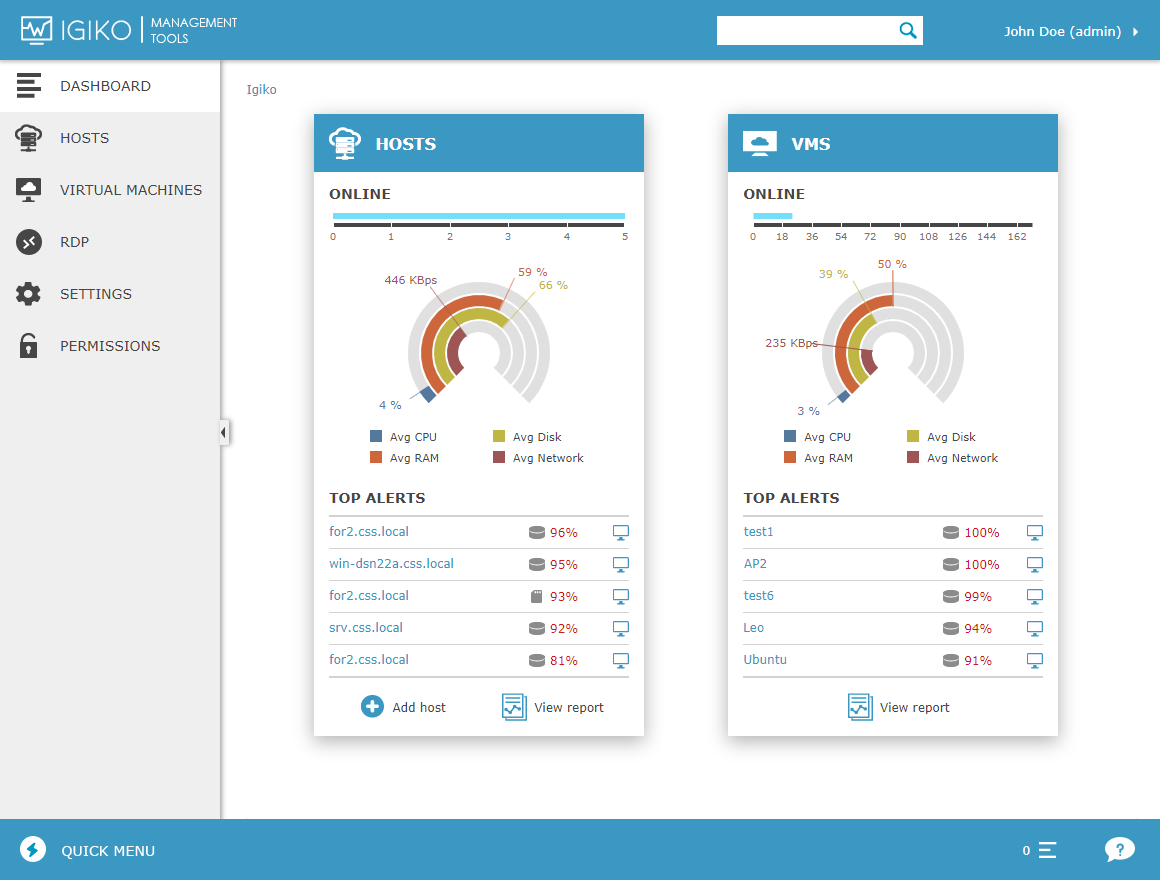
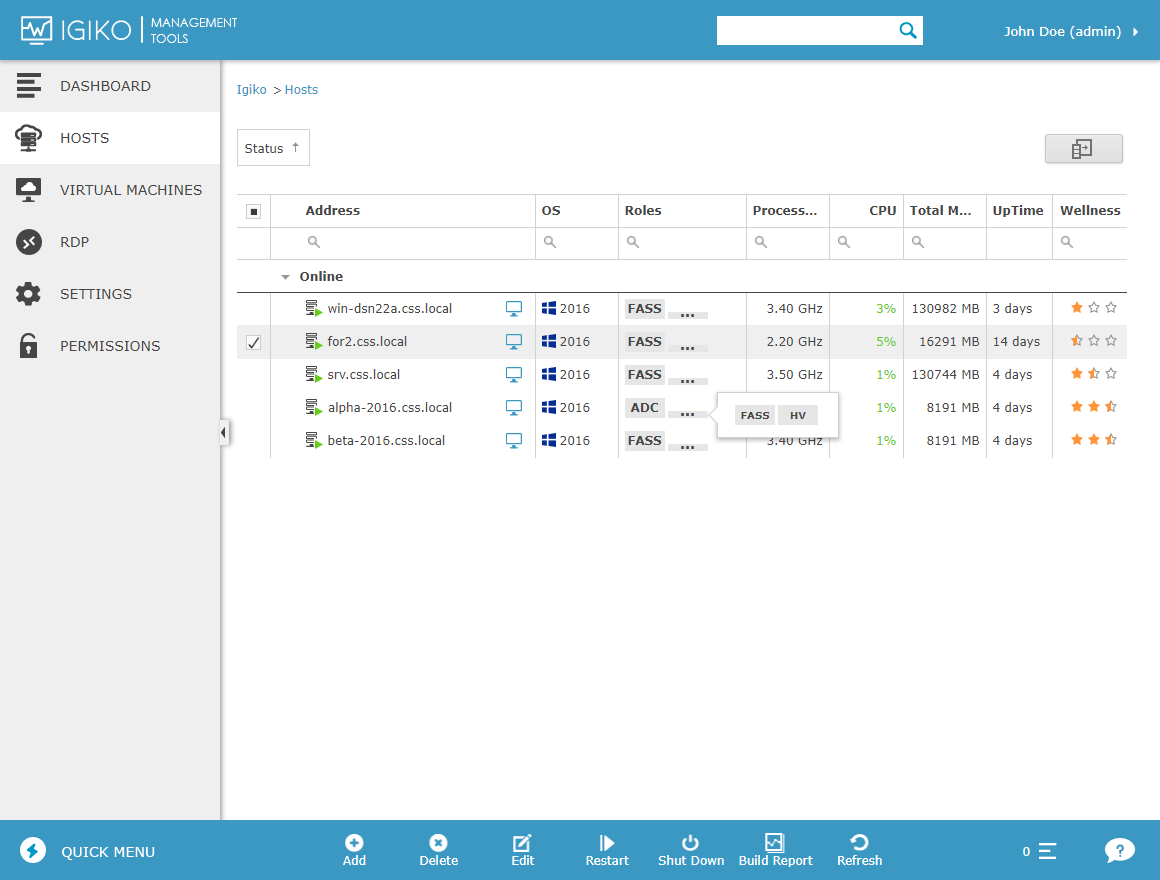
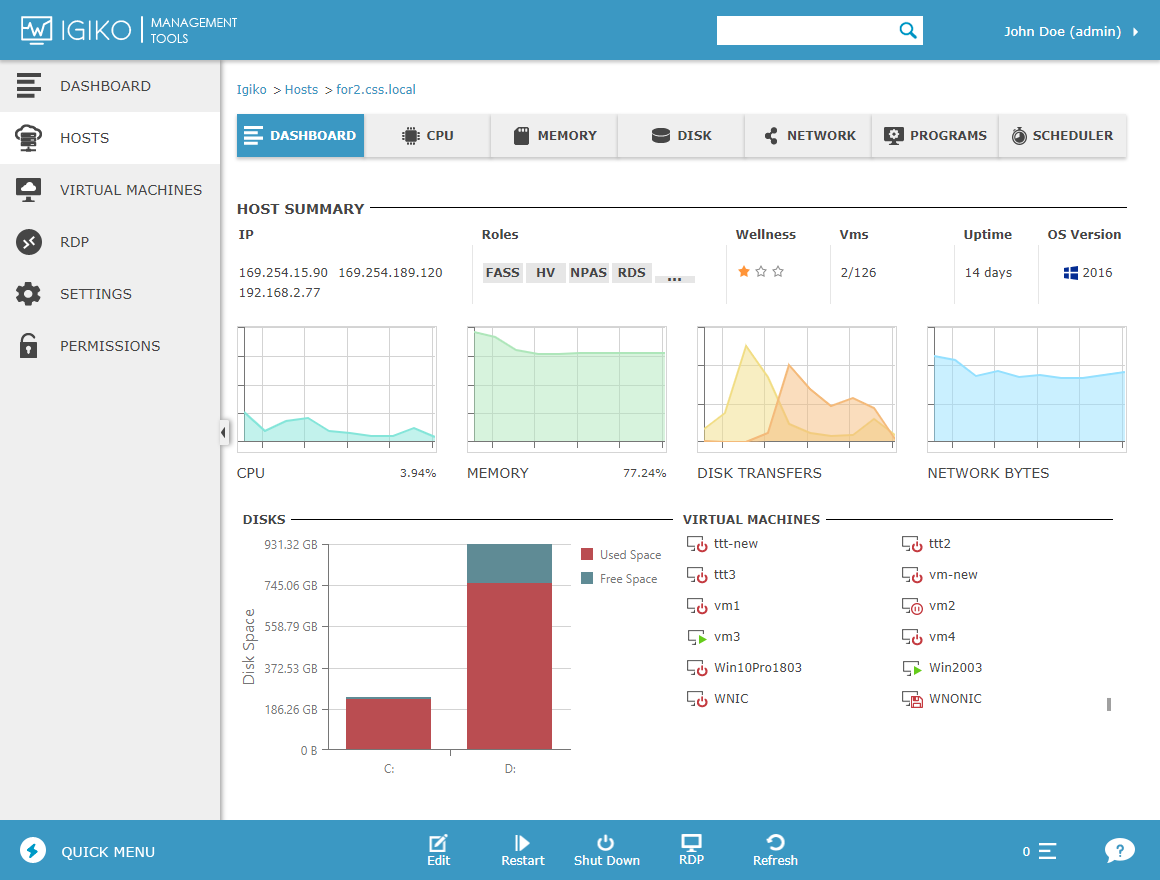
A couple of minutes after you add hosts, the app will display their status, general dashboard, and monitoring data. You will also be able to set up user permissions and thresholds for monitoring alerts. If you fail to add a host or it’s displayed in offline status, check that Windows Remote Management is configured on the host. You can do this by running the winrm /qc command as an administrator.