


123This guide will outline the steps to configure the "Create VM" feature in Igiko. This process implicates editing the Igiko.exe.config file to set the paths for your ISO directory and VM disk, as well as determining the default switch name.
Key Definitions
ISO Directory: Refers to the directory where your ISO files for the operating system are stored. This could be a network shared folder if you have more than one host and want use global iso library.
VM Disk: Refers to the location where your virtual machine's disk data is stored. This could be SMB folder as well. Please note that SMB folders should be properly configured. See the article https://learn.microsoft.com/en-us/previous-versions/windows/it-pro/windows-server-2012-r2-and-2012/jj134187(v=ws.11)
Default Switch Name: Refers to the network switch which all created network adapters will be connected to by default.
Prerequisites
Ensure you have administrative access to the Igiko software and know the paths to your ISO directory and VM Disk.
Configuration Steps
Edit Igiko.exe.config File: Locate the Igiko.exe.config file in the Igiko application directory and open it for editing.
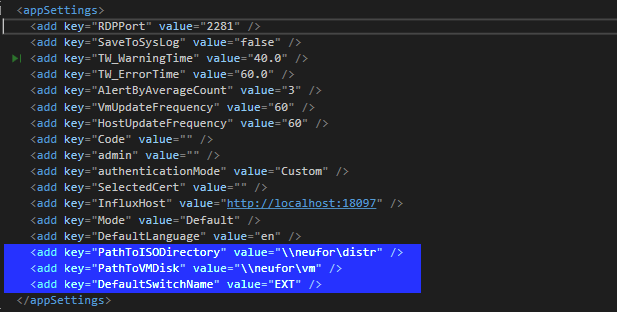
Set Paths and Values: Define the following keys with your specific paths and values. Replace the empty double quotes ("") with your specific paths and switch name.
Save and Close File: Save the changes and close the Igiko.exe.config file.
Restart Igiko Service: Restart the Igiko service for the changes to take effect. You can usually do this through the services management console on your operating system.
Creating a New Virtual Machine
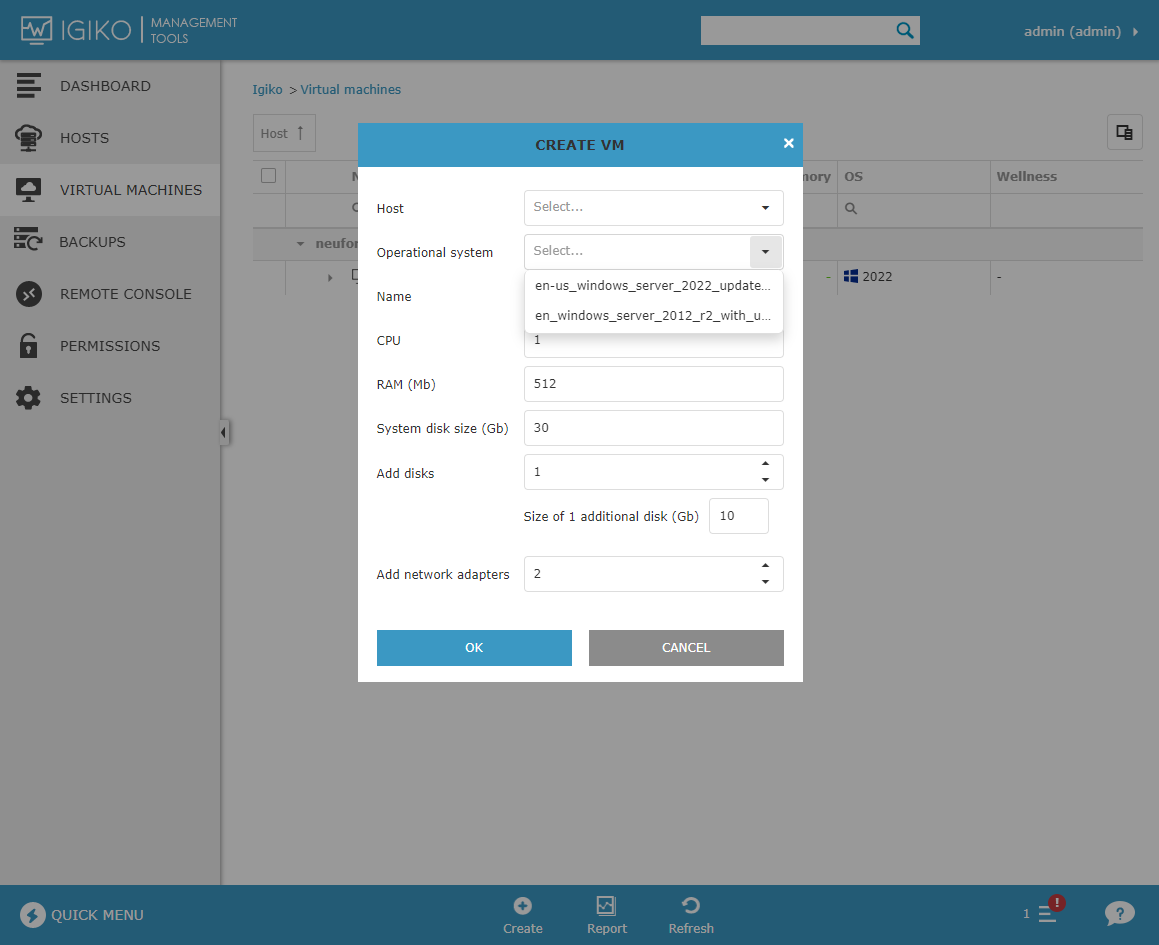
In the Igiko software, open the "Create VM" dialog.
Select your desired ISO file from the directory specified in the PathToISODirectory.
Specify the number of network adapters needed for the VM. They will automatically connect to the network switch specified in DefaultSwitchName.
You can now proceed to manually install the operating system from the selected ISO file.
Note: Automatic IP address assignment is currently possible only if DHCP is enabled over the network connected to the DefaultSwitchName.
There are no options to set specific IP addresses in the "Create VM" dialog.
Please note, when using Workgroups
If you use UNC paths to specify the location of template virtual disks and use Workgroups, then to ensure that the functionality for creating virtual machines from templates is working, turn off password checking for accessing shared folders.
This must be done due to the Windows flaw, which is that when establishing a remote PowerShell session, the credentials located on the remote computer are not available in this session.
To do this, follow these steps:
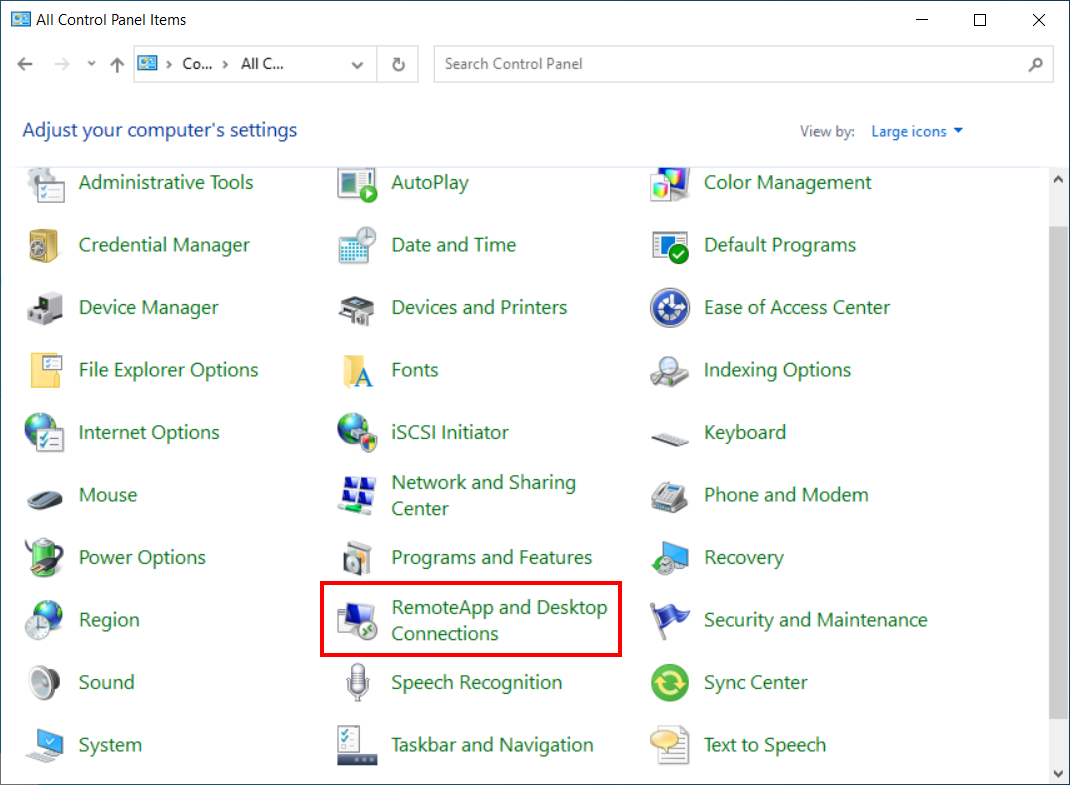
In the Control Panel, turn on Large icons and select RemoteApp and Desktop Connections.
Open Change advanced sharing settings.
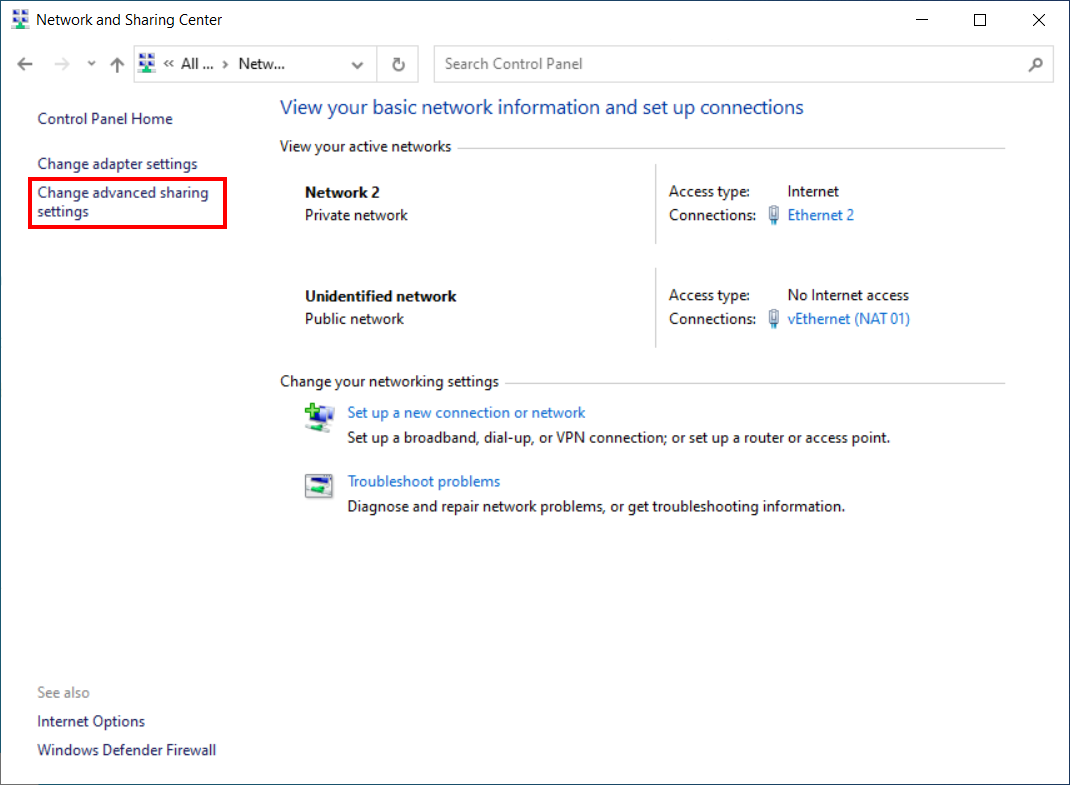
Rewind to the bottom, and in the All Networks/Password protected sharing section, select Turn off password protected sharing.
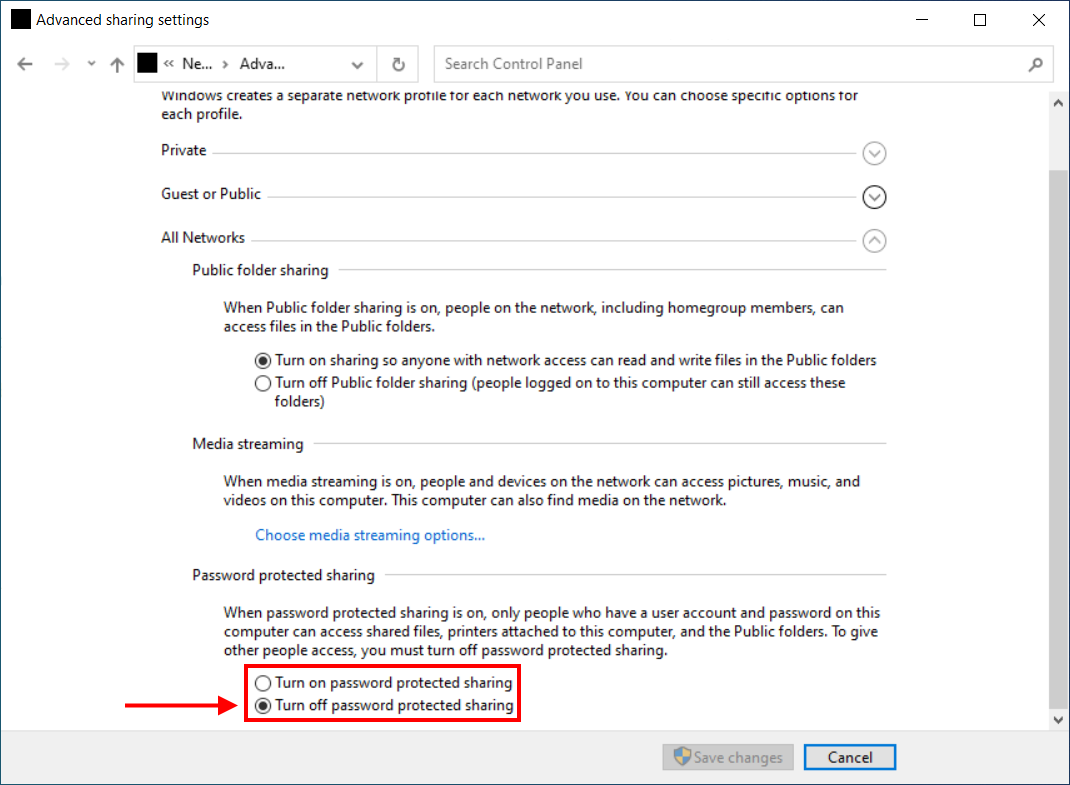
Click Save changes.
That's it, now the function of creating virtual machines from templates will work.
Further Suggestions and More.
Please contact us regarding any suggestions on the VM creation process. We're planning and actively working on new features, including creating VMs from sysprep'ed virtual disk templates for future releases.