


The article provides step-by-step instructions complete with video on how to install and set up the free version of Igiko Management Tools.
The installation process is quite simple. All you need is a computer running Microsoft Windows, which has .NET Framework 4.5 installed. Once the installation is complete, just open your web browser to start using the app. Below is a more detailed description of all steps from Igiko installation to initial configuration.
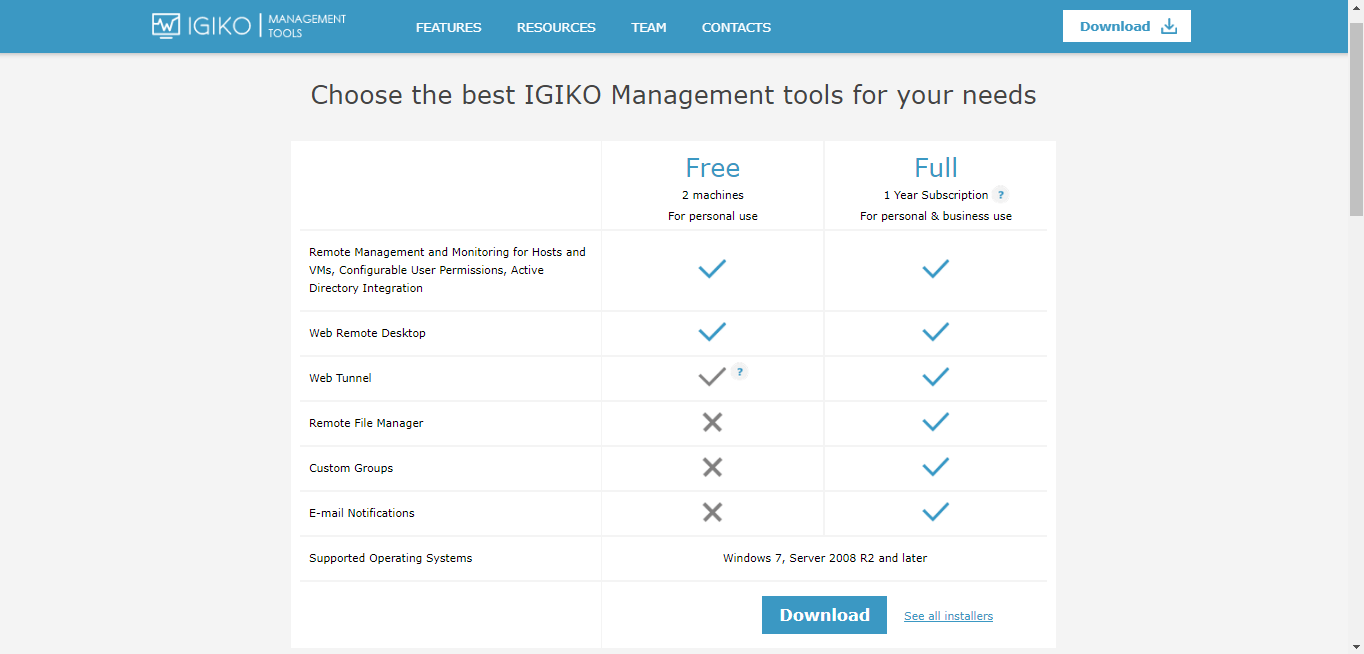
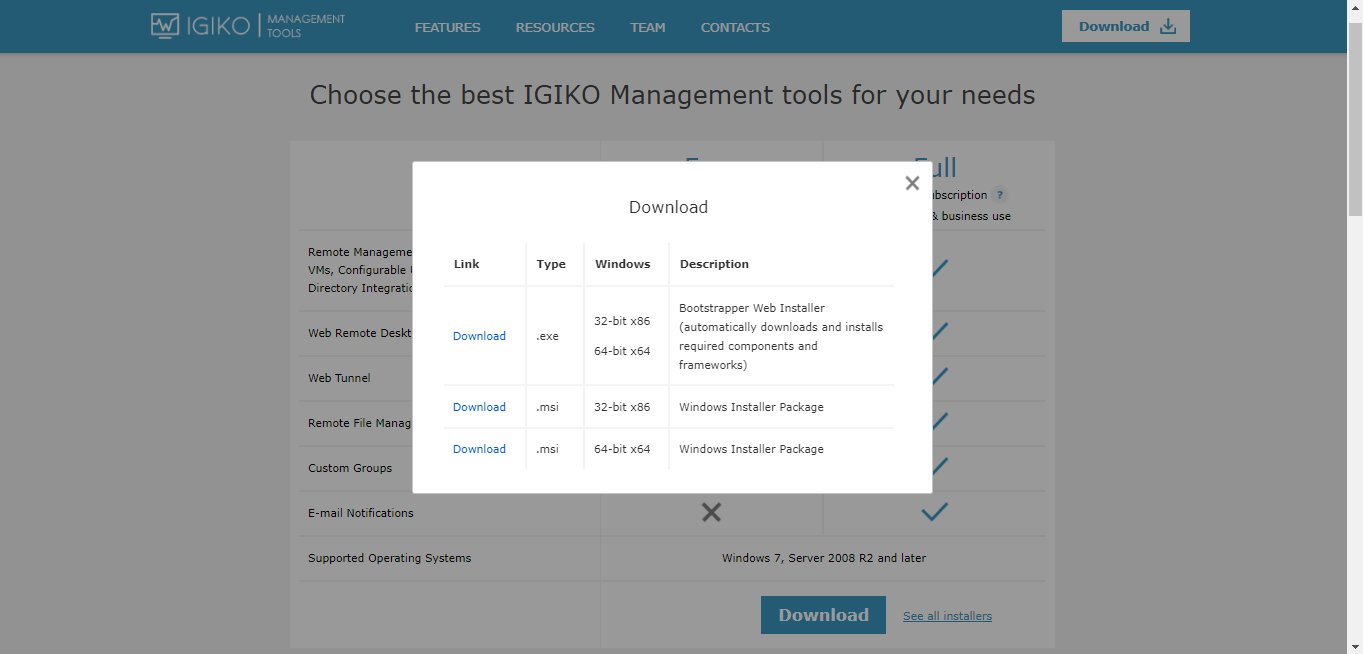
First, go to the download page. Once you there, you will be able to see the differences between free and full versions. Also, all users can choose between different installers version and choose what is best for them. However, we are highly recommended the latest one.
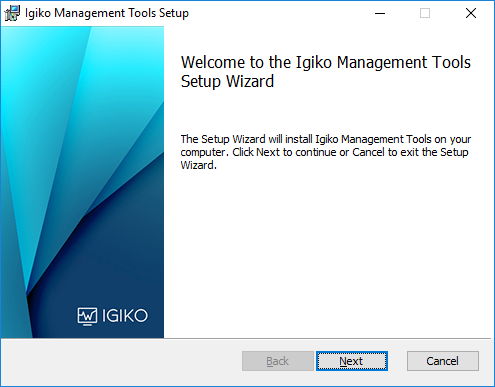
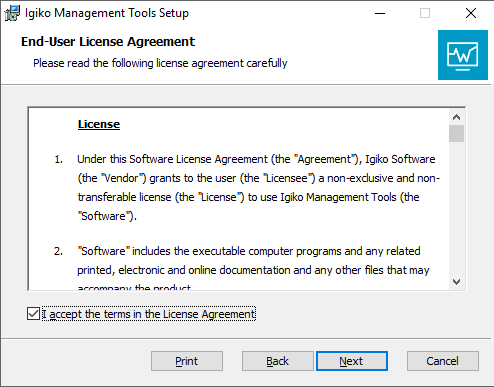
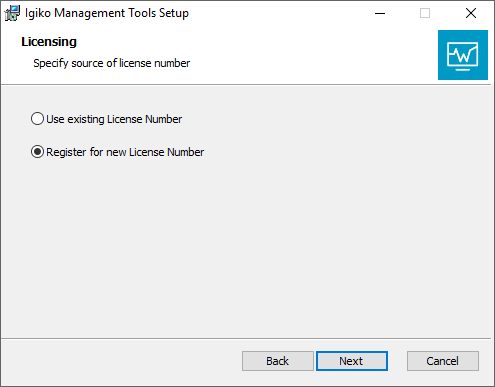
After the downloading the installation window will be opened. In the first two screens of the setup wizard, you are introduced to the requirements. Then asked to read and agree to the terms of the End User License Agreement. If you already have the license number proceed with the existing one or register for new license number.

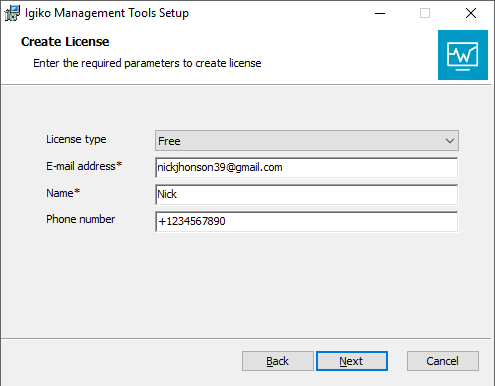
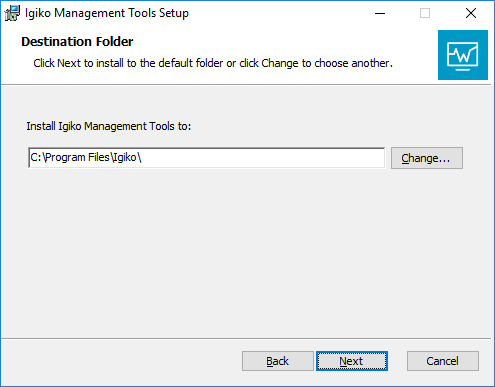
Enter the required parameters to create new license. Also, choose here between free and full version to be installed. Make sure that the e-mail address is receiving incomes to get your license number. Choose the destination folder or leave the default folder.
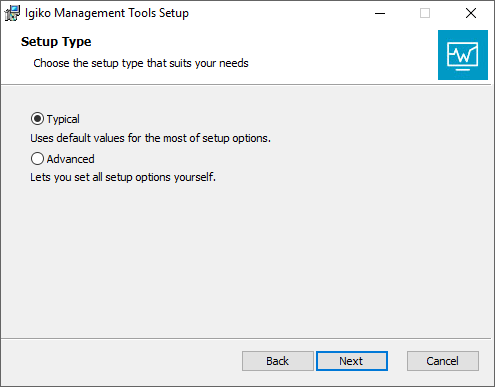
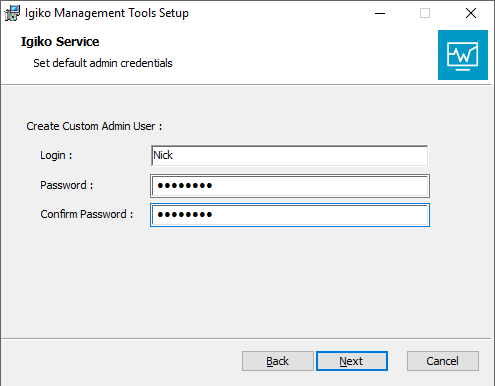
In the next step, you must choose between typical or advanced setup type. For the free version typical is better and easier, when advanced is better for the full version. This article is about the installation of the free version, therefore we are choosing the typical. Create a custom admin user by entering the credential of an existing one.
This must be a domain user and at least a local admin.
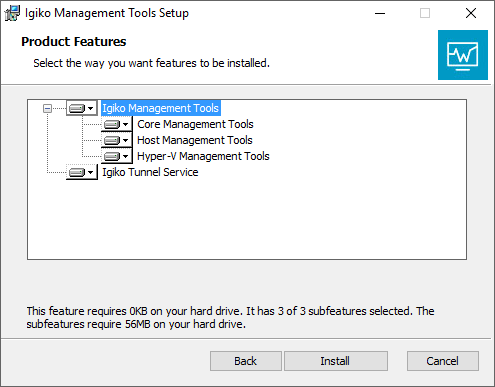
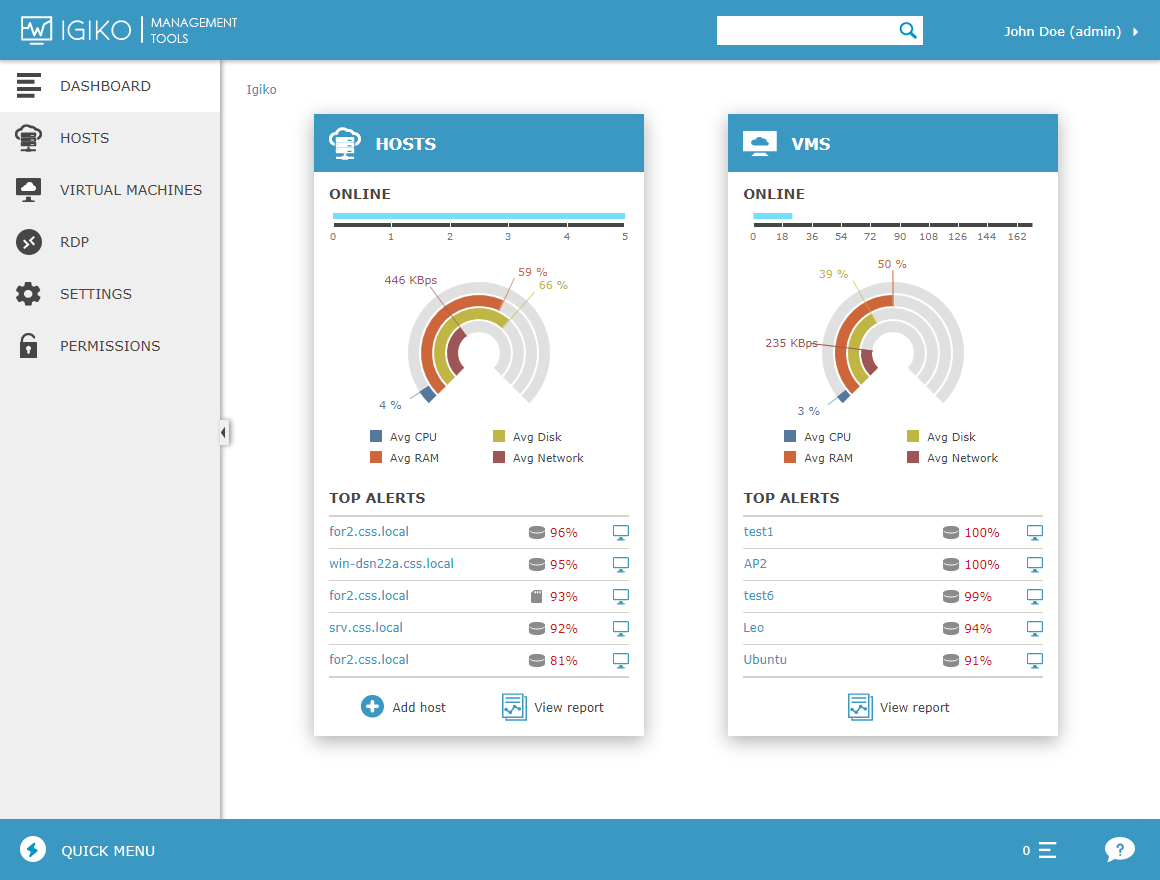
In the last step you choose the components to install. If you have no Hyper-V hosts, you may skip installing Hyper-V Management Tools, along with the web tunnel feature. Finish the setup and your dashboard will be opened automatically.
For the video tutorial check this link.