


We are glad to inform you that Igiko Management tools has had a major update. As part of this update, we have implemented integration with the billing panel for web hosting WHMCS (Web Host Manager Complete Solution). We have also added a pay-per-use licensing model to Igiko, which is very important for service providers.
WHMCS is a comprehensive tool that specializes in providing automated solutions for web hosting businesses.
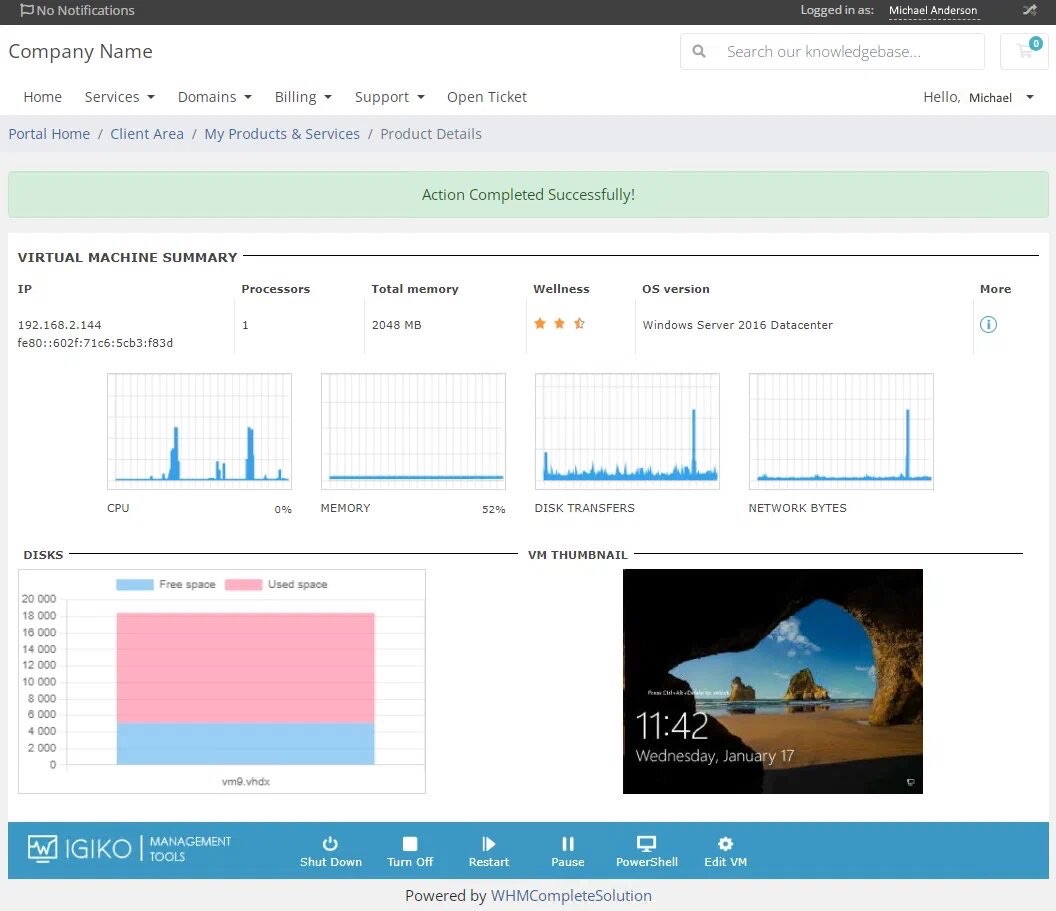
Igiko's integration with WHMCS means you can now manage all of your resources directly from WHMCS, minimizing the need to switch between different platforms. To date, this is the first and only integrated solution for managing Microsoft Hyper-V virtual machines via WHMCS.
This functionality will allow you to:
Efficiently manage virtual machines directly from the WHMCS internal interface.
Receive detailed performance information for virtual machines.
Provide remote access to virtual machines, regardless of their geographic location.
Organize the billing and customer support workflow.
Start using WHMCS integration today and experience the benefits it offers to run your business. With the Igiko app equipped with the latest features you are always one step ahead of the competition. You can also see the instruction below and download here.
INSTALLATION
To install Igiko provisioning module put the Igiko module folder inside /modules/servers/ folder of you WHMCS.
Then open config.ini file inside the module folder with any text editor and enter login and password of Igiko admin.
After that go to Configuration > System Settings > Servers.
Click "Add New Server". Choose Igiko in Module dropdown, enter hostname of your Igiko service and create new server.
You may ignore username and password fields as they are taken from config file.
Then go to Configuration > System Settings > Products/Services
Create a new group for Igiko products and then create new product.
Select "Server/VPS" as Product Type, enter all necessary information and choose Igiko in Module dropdown.
Go to product options of newly created product. Make sure to uncheck "Require Domain" checkbox in details section.
If you changed port of Igiko service or RDP specify them in Module Settings in Port and RDP Port fields.
Do not forget to configure addons if you have any installed and disable ones that are not applicable to Igiko products.
CONFIGURABLE OPTIONS
In order to allow your clients to configure VM parameters you need to set up Configurable Options in WHMCS.
Configurable Options are located in Configuration > System Settings > Configurable Options.
Create new Configurable Options group and add appropriate options from the ones listed below.
When creating configurable option of type "Quantity" you also need to add an option with the same name in the "Options" table.
Otherwise they will be presented to client during ordering but will not work properly. Doing so will also allow you to set up billing options.
Igiko module provides these possible options:
1. OS. Type: Dropdown. Allows user to select VM's operating system.
When adding dropdown choices name them according to following template without parentheses: (name of ISO file)|(OS name visible to client).
For example, to add Windows Server 2012r2 as an OS choice you would write: windows_server_2012r2.iso|Windows Server 2012r2.
All of the ISO files need to be located inside ISO Storage specified in Igiko config file.
2. CPU. Type: Quantity. Allows user to select amount of created virtual processors for VM.
3. RAM. Type: Quantity. Allows user to select amount of RAM provided to VM (in GBs).
4. System Disk Size. Type: Quantity. Allows user to specify amount of space on the system drive (in GBs).
5. Additional Disk Size n. Type: Quantity. Allows user to specify amount of space on any additional drives (in GBs).
If user enters 0 for this option, the disk will not be created.
Add as many options named "Additional Disk Size n", as the maximum amount of additional disks you allow to be created for VM, replacing n with a disk's index starting from 1.
6. Network Adapter Count. Type: Quantity. Allows user to specify how many network adapters the VM should have.
If you want to allow users to change Configurable Options later on, check "Configurable Options" checkbox in Upgrade tab of product.
TEMPLATES
This section is not necessary for WHMCS to work with Igiko module but makes user experience easier.
When creating Server type product WHMCS requires users to enter hostname, root password and namespace prefixes.
These values are not used by Igiko module. If you want to disable showing these fields to users you need to edit order template of WHMCS.
Order templates are located inside /templates/orderforms folder of WHMCS. Inside the folder there will be more folders, each corresponding to one order form template.
Open the folder of the order form selected for group of products containing the Igiko product (Default is Standard Cart).
Locate "configureproduct.tpl" file. If there is no such file, go back to /templates/orderforms/standard_cart folder, the file should be there.
Replace "configureproduct.tpl" file with the one provided with Igiko module.
Igiko module also does not allow user to shrink disk size and reduce network adapter count.
Due to WHMCS capabilities it is not possible to forbid users to lower certain configurable options but a warning can be shown to user if they attempt to do so.
In order to add the warning find "upgrade.tpl" file inside /templates/twenty-one/ folder. Replace it with provided "upgrade.tpl" file.
The provided templates assume that product group containing Igiko module products is called "Igiko".
If this is not the case, you need to open template files you are going to use with any text editor and replace all mentions of "Igiko" in them with your product group name.